PaintTool SAI is a lightweight painting application that’s beloved by digital artists who specialize in animated characters. This software for Windows comes with a broad array of useful tools, most of which are easy to learn.
In this tutorial, we’ll show you how to separate a character’s outline and flat colors and use them as a mask to draw and then blend nondestructive shadows and highlights inside the lines. We’ve laid out a few simple tricks that you can use if you’re short on time as well as some more detailed methods if you prefer to do it yourself.
It’s all about the layers
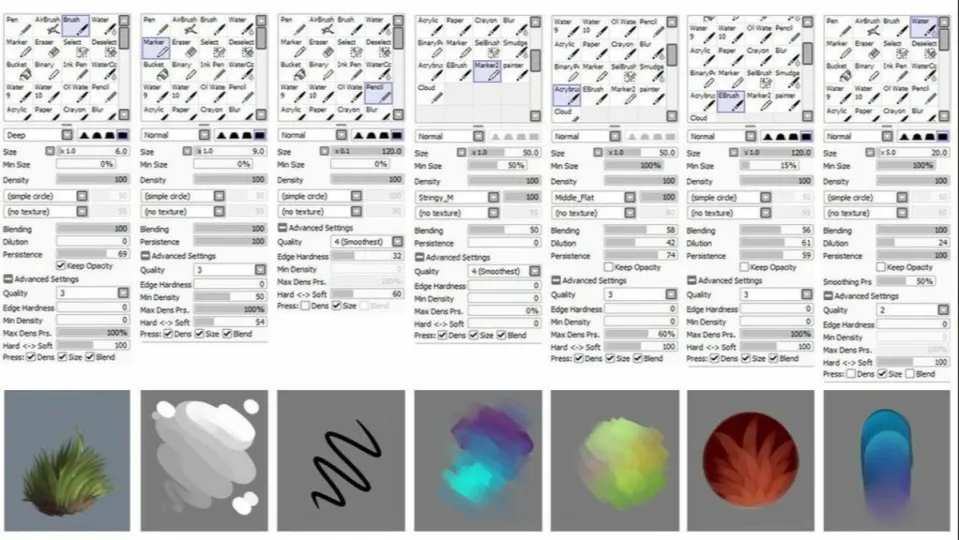
Once you’ve finished your characters’ outlines and filled in their basic flat colors, it’s time to bring them to life with shading. There are a few different ways to polish your characters and make them look at home in their environments. However, most of these methods involve creating a shading layer.
– Start by merging the levels that contain your outlines and flat colors. Select the relevant layers, and click the bottom left button in the Layers Panel showing a plus sign and a down arrow. You can separate them later if you need to.
– Select this merged layer, and click its Preserve Opacity box, which is displayed in text above the Layers Panel. Preserve Opacity locks all the lines and fills you’ve already drawn, making it easier to keep your shading neatly inside the lines.
Creating new shading layers
In general, more layers will give you more control over your shading. Here’s how to create new shading layers in PaintTool SAI.
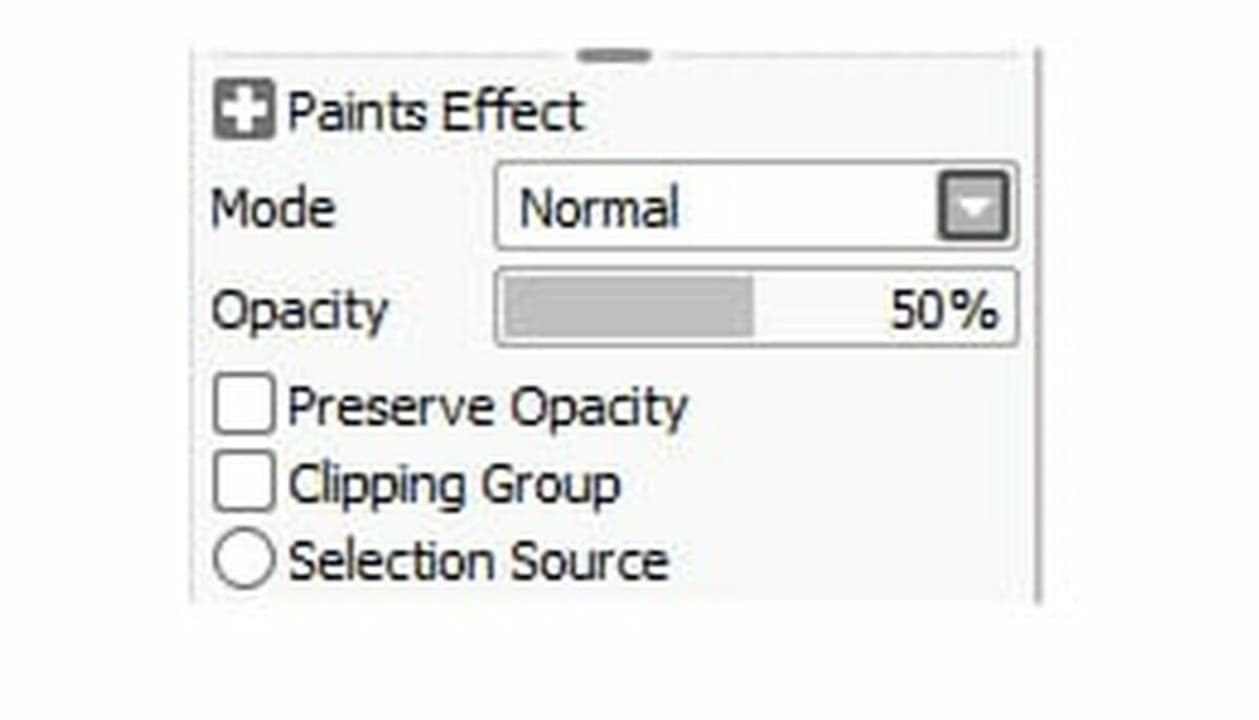
– Click on the New Layer icon at the top left of the Layers Panel, which shows a blank piece of paper. This layer is where you’ll draw your shading, so make sure it’s above your outline layer. Leave Preserve Opacity off for this layer, but click the Clipping Group box right below it. That will clip your shading layer to the outline layer below so it can act as a mask when you shade.
– Right above the Preserve Opacity box that you left unchecked, you can set the transparency of this shading layer. Anywhere from 10% to 50% opacity will let you see the outlines below clearly.
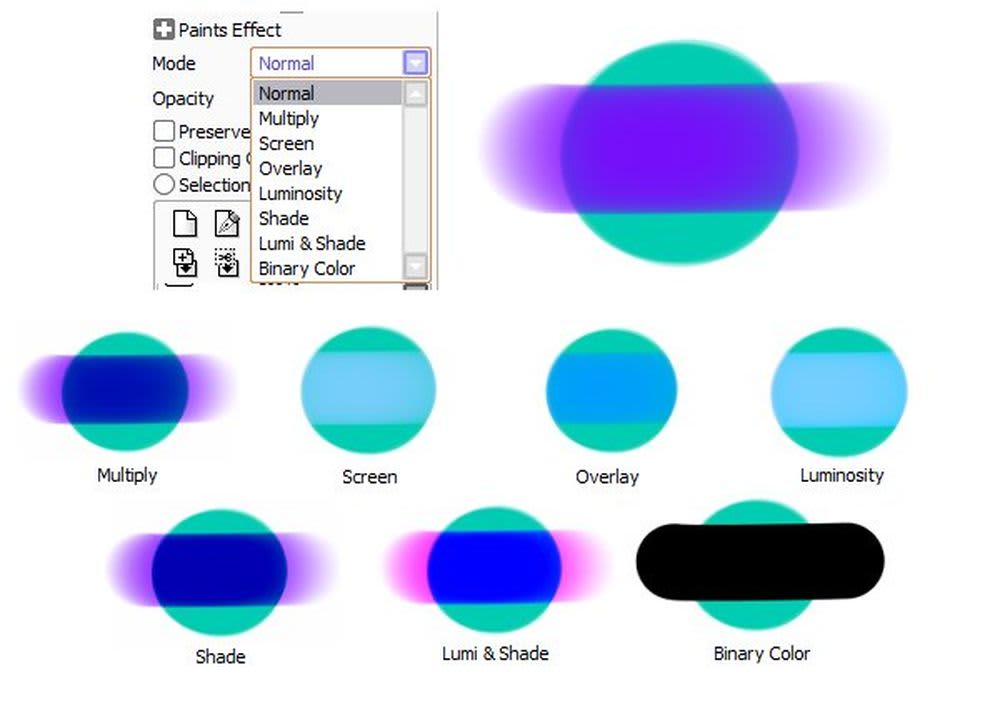
– Above the opacity meter, you can set your layer’s mode, which is how this shading layer will blend with your outline layer. Normal Mode will completely cover the layer beneath it, but almost any other blending mode will work, depending on your shading style. The Multiply, Shade, Screen, and Luminosity modes are popular options to darken or lighten your characters. Overlay and Lumi&Shade work both ways, allowing you to make shaded areas darker and highlights lighter at the same time.
Adding fringe effects
For a quick shading, follow these steps for adding fringe effects.
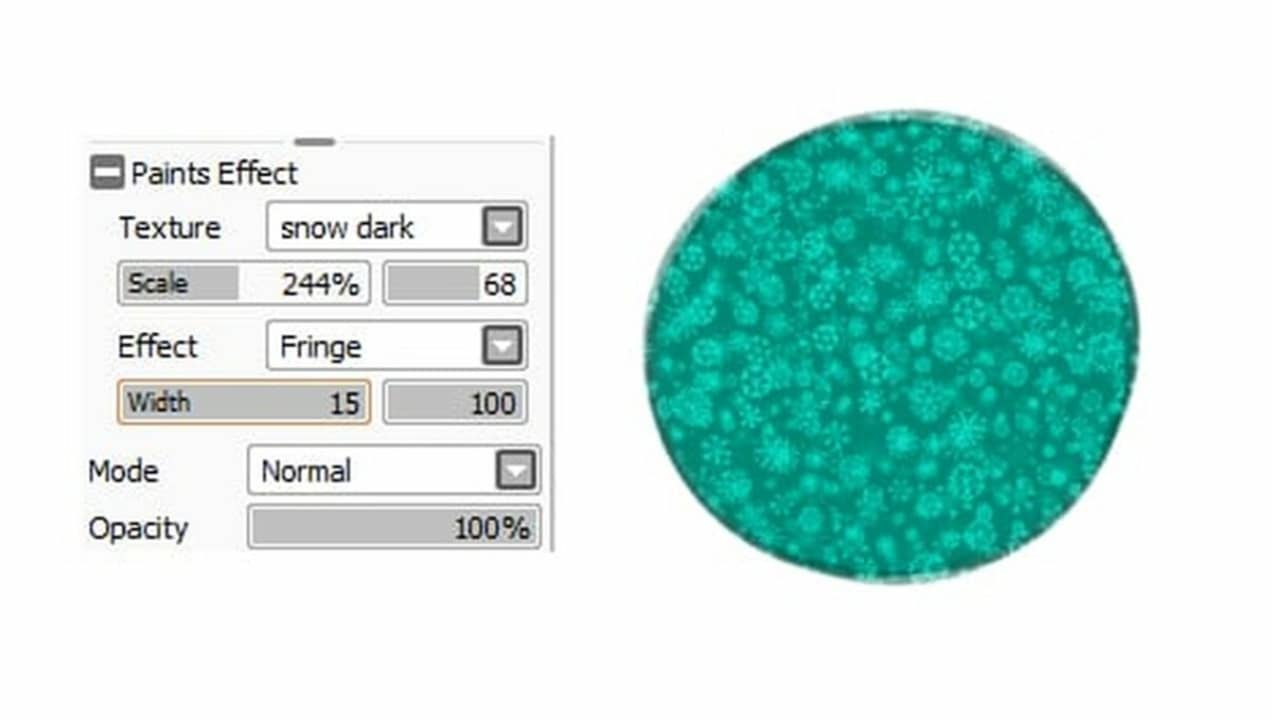
– Open the Paints Effect drop-down menu, and select the Fringe Effect option. That will add a thin band of automatic shading to all your edges.
– You can change the effect’s opacity and width to modify the darkness and length of the generated shadows.
Adding shadows

If you want to add detailed shadows in PaintTool SAI, you can do so from the shading layer.
– First, select a darkening mode like Shade or Multiply. Select a brush size and color that you feel comfortable with, and use it to darken the areas on your character opposite your light source.
– Once you’ve painted on the shadows, you can smooth away any rough edges by giving them a once-over using the Oil Water brush.
Add highlights
Another great way to improve your visual dynamics is to add highlights in PaintTool SAI.
– Add a new layer above your shading layer, and use a lightening mode like Screen or Luminosity.
– Pick a thin brush size and a bright color to touch up the areas where the light hits your character.
– You can also add thin dabs of white to make glossy or metallic surfaces shine. Use the Oil Water brush to blend the edges if necessary.
Develop your own shading style in PaintTool SAI
Once you understand the basics of using PaintTool SAI’s brushes and layer modes to blend in your shading, you can play with your technique and develop your own shading style.
If you like to get into the details, you can create separate layers for each flat color you work with and then clip new shadow and highlight layers directly to each color layer. This method lets you use specific color shades that are slightly darker and lighter than each original flat color.
If you prefer to keep it simple, you can leave all your colors in the same layer and add just a single layer for your shadows. Make sure your shadow layer is in Multiply mode, fill in all the shadows using a general-purpose color like gray or purple, and adjust the opacity till it looks good to you. If you want to add highlights, you can do this using another single layer set to Screen. Paint with a white brush, and blend and fade to taste.
Ready to try out some more PaintTool SAI design techniques? Check out our guide on how to do a disintegrate effect in PaintTool SAI.